Setup Umami self-hosted analytics using Laravel Forge
Joe Vallender • April 15, 2021
Many of us are loooking to move away from Google Analytics where possible. Reasons for doing so include:
- Data privacy concerns
- Avoiding cookie warnings
- Seeking a simpler UI to share with clients/team
While looking into alternatives you'll find a range of paid, privacy-focussed SaaS analytics products, as well as some self hosted open source options (some of which are shared by companies who also offer a hosted paid service).
I wanted a self hosted option and before settling on Umami.js I also checked:
For all I know, these might be great - but I didn't get to a feature comparison or to try any of them out. I went with Umami.js simply because of how I wanted to install it on this occasion: on an Ubuntu VM, with Postgress/MySQL, and without using docker.
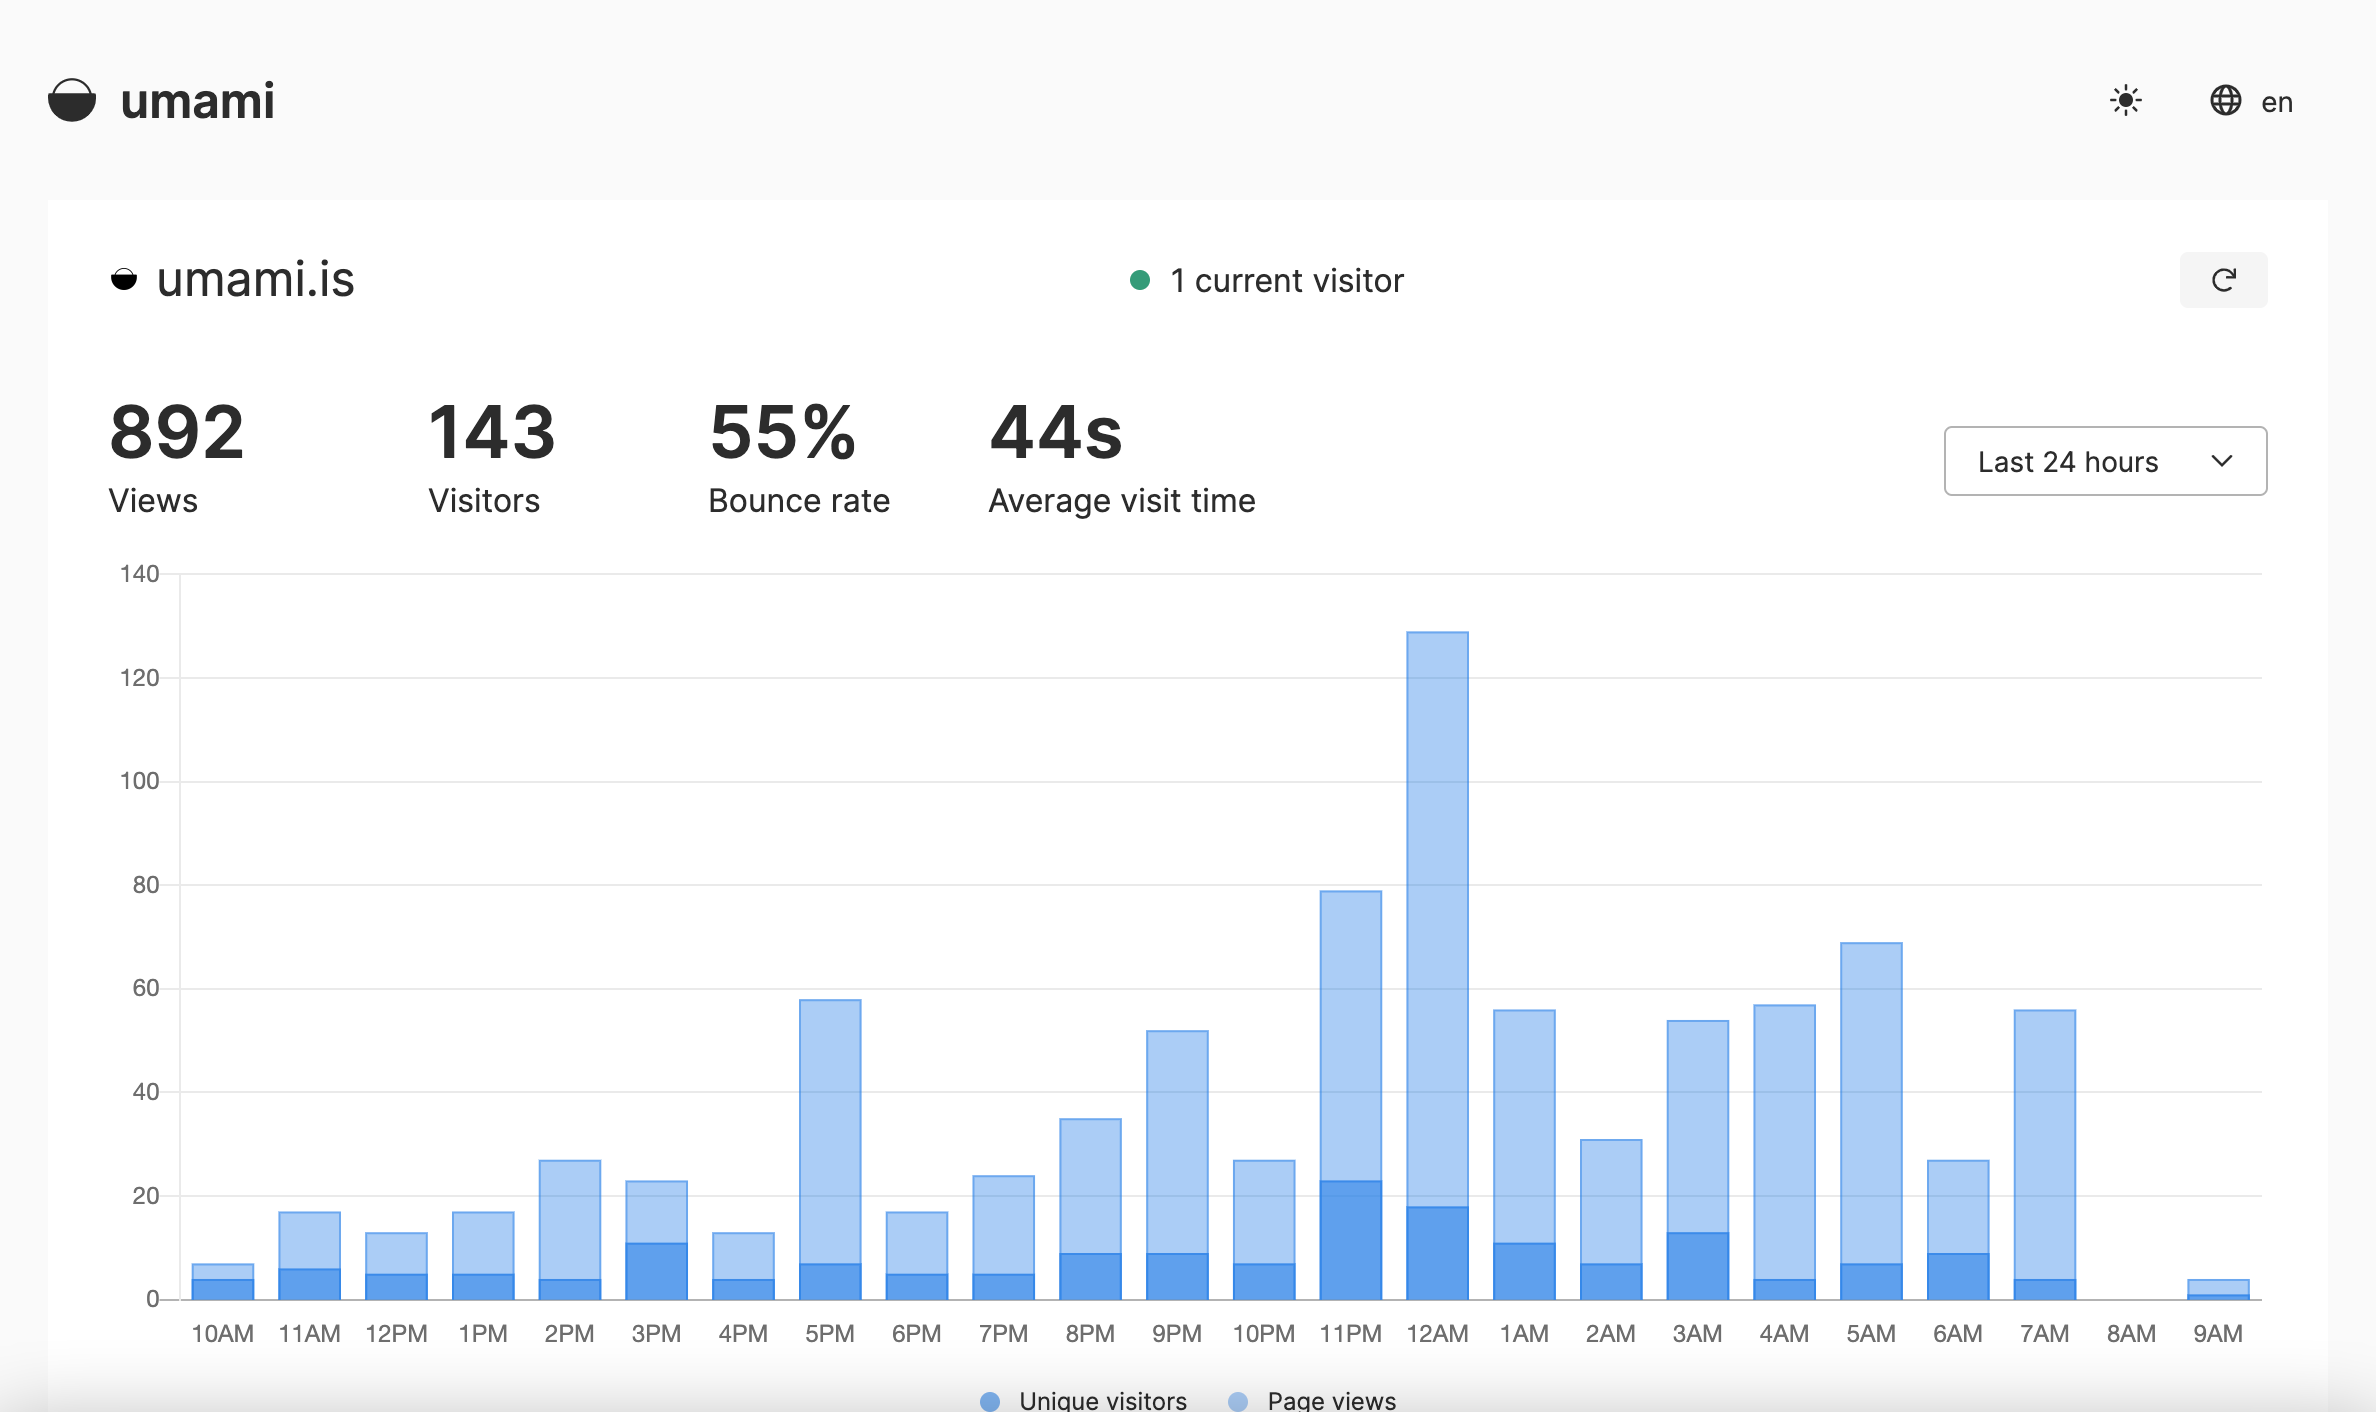
One nice feature of Umami.js is easily sharing a public dashboard for a website, you can take a look at their own public dashboard (pictured below) to see if it's the kind of thing you're looking for.
Instructions
These instructions are for Laravel Forge, which makes things even easier if you're using it but the installation, build instructions, and key Nginx config snippet apply to any situation.
SSH into your VM and create the database you plan to use.
mysql -u forge -p
create database umami;
Then from /home/forge/ run.
git clone https://github.com/mikecao/umami.git
cd umami
npm install
mysql -u forge -p umami < sql/schema.mysql.sql
Now create a .env file in the same folder.
DATABASE_URL=mysql://forge:PASSWORD@localhost:3306/umami
HASH_SALT=RANDOMSTRING
Replacing PASSWORD with your Forge MySql database password and RANDOMSTRING with... a random string! From your Linux server you can generate a simple one with the code below, where 32 is the string length.
cat /dev/urandom | tr -dc 'a-zA-Z0-9' | head -c 32
Now everything is in place to build the project, this could take a minute as it optimizes the production build. If everything went well, we can also start it to check that command runs successfully too.
npm run build
npm start
If everything has worked so far, you'll see some terminal output showing that it's now running on localhost:3000 (if you're already running something on port 3000 you can change the port by adding PORT=xxx to your .env file and building again).
At this point, everything is running but we can't see the app, and it's not accessible from the outside world. We'll resolve that soon, but first, now we know the app runs correctly, we'll add it as a server Daemon (see below) and Forge will configure Supervisor to make sure it's always running.

Now we'll give it a working web address, so head over to wherever you manage your DNS and create a new A Record for the web address you want to use, stats.yourdomain.com for example.
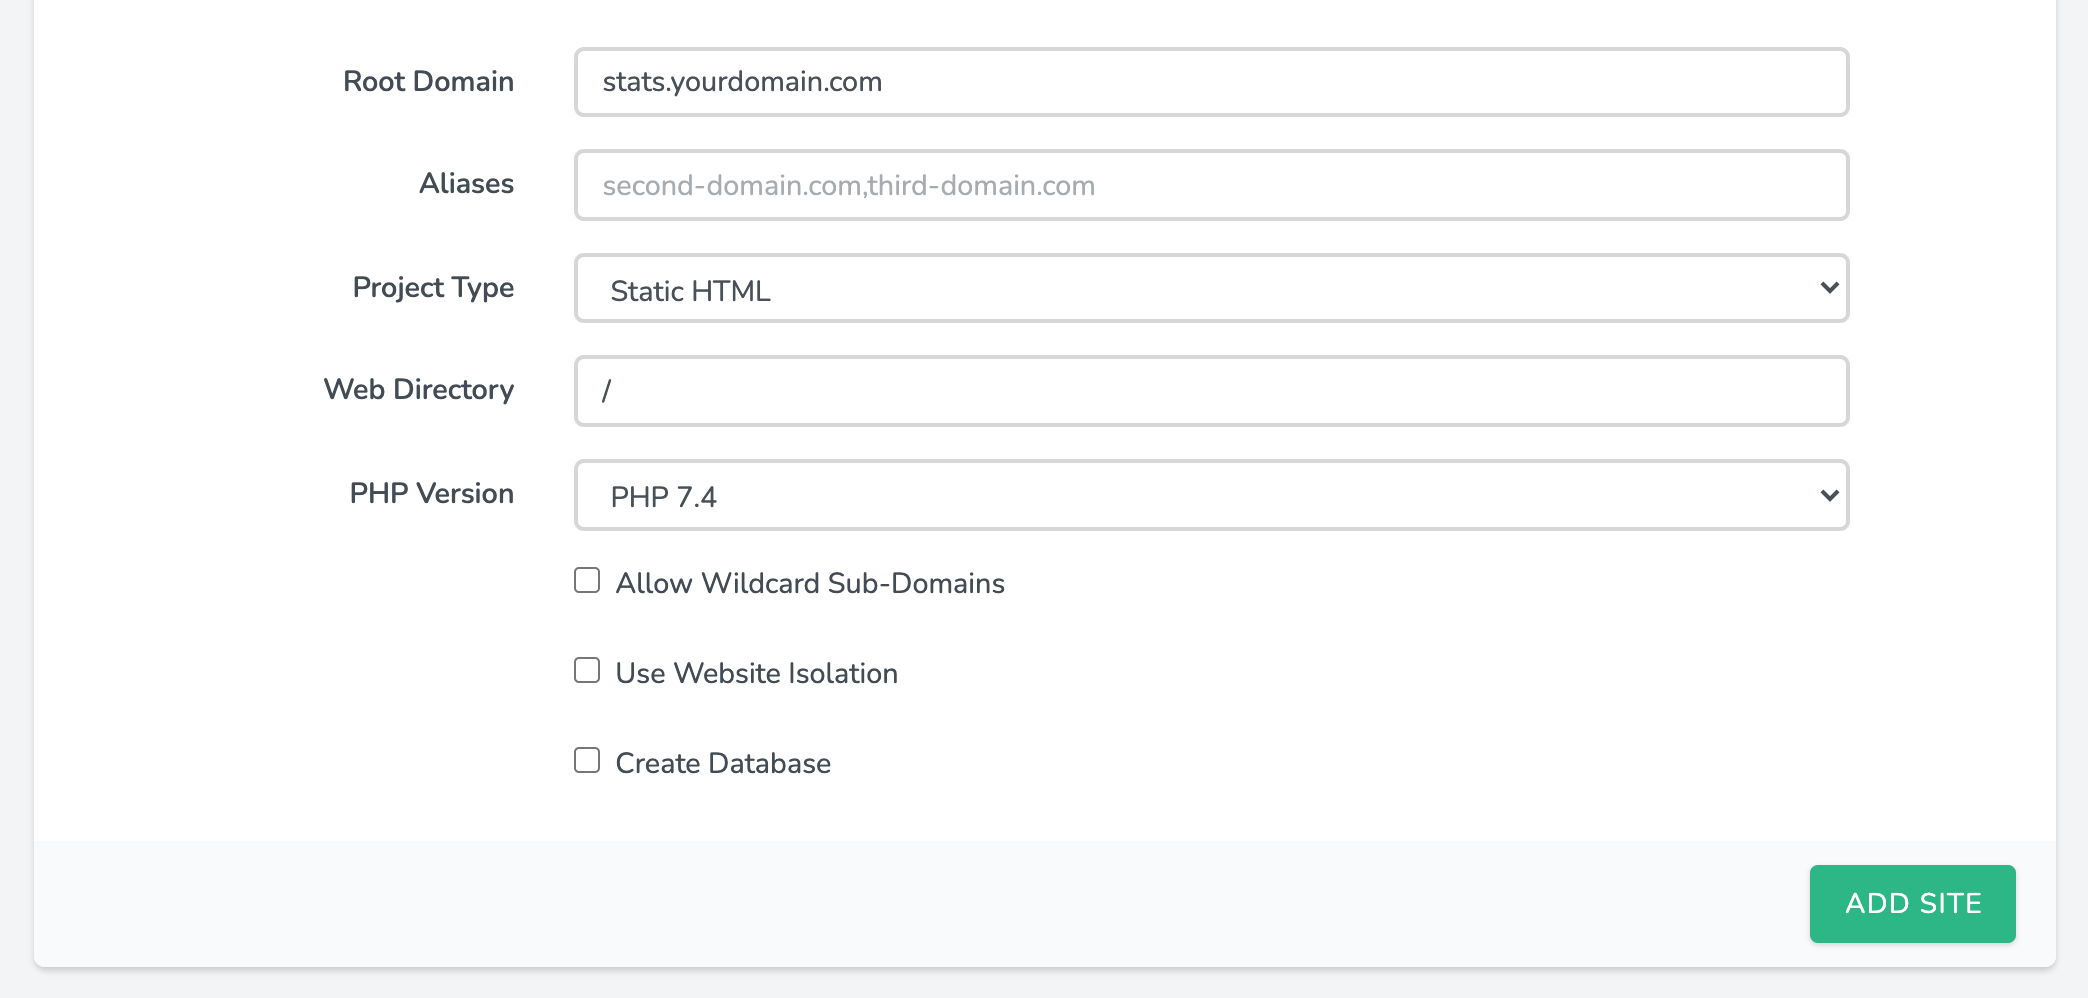
Next we'll use Forge to create the appropriate starting point Nginx conf...
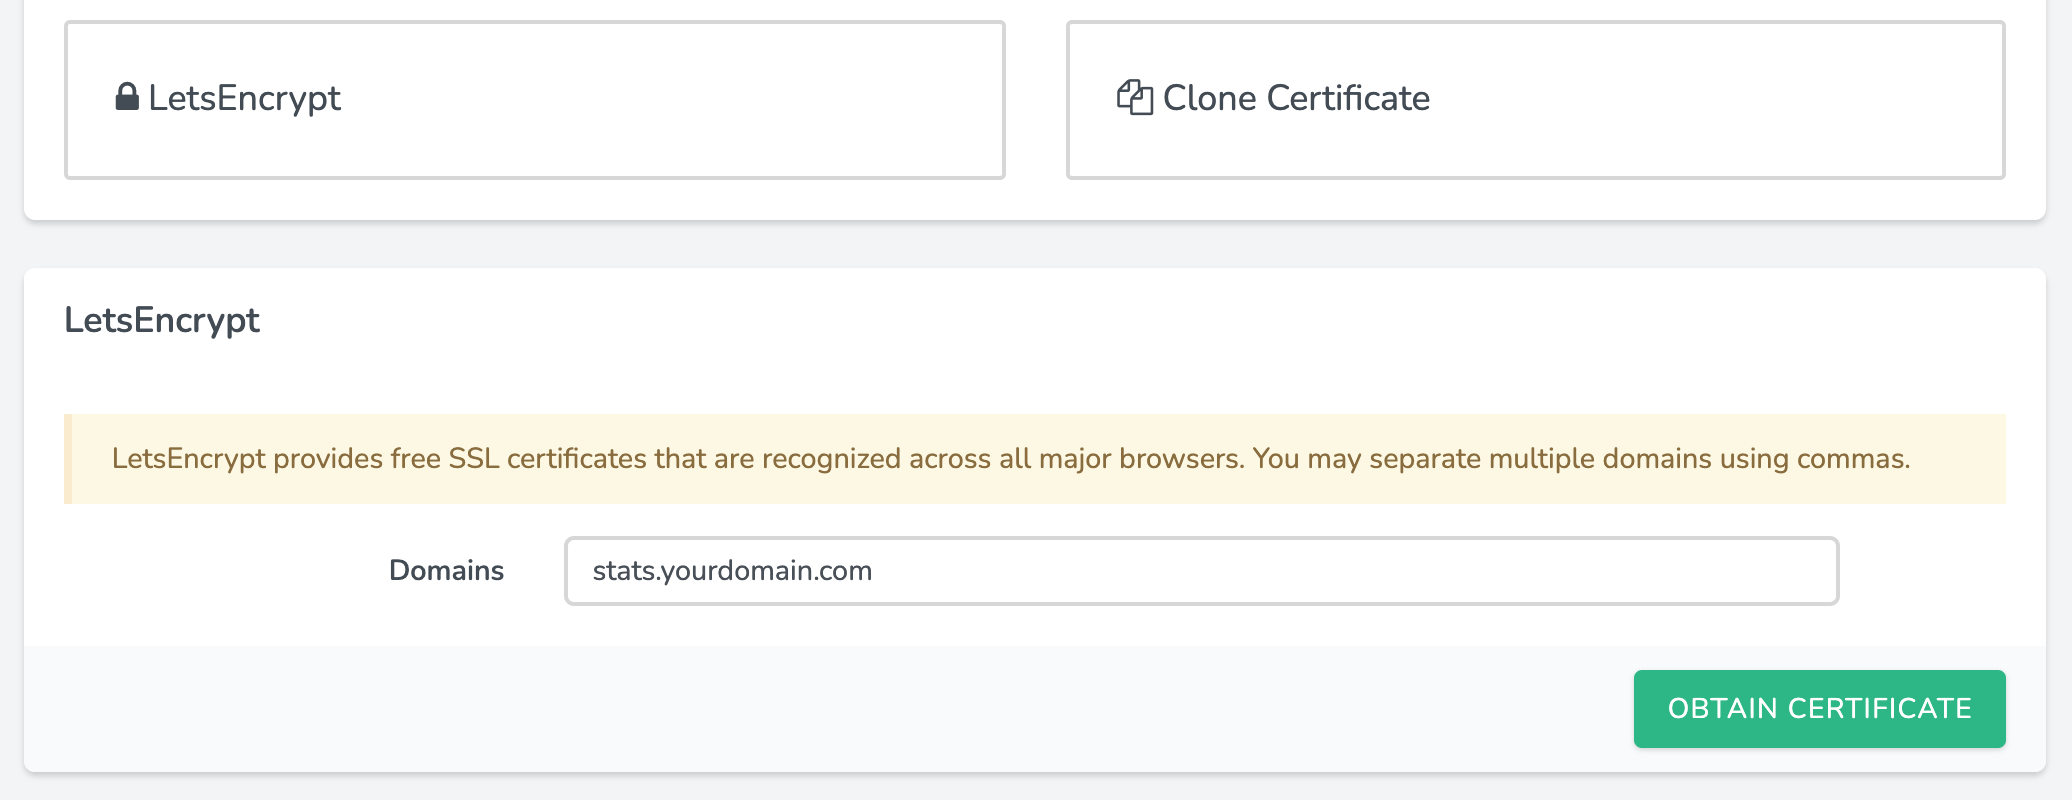
... and create a LetsEncrypt SSL certificate for us.
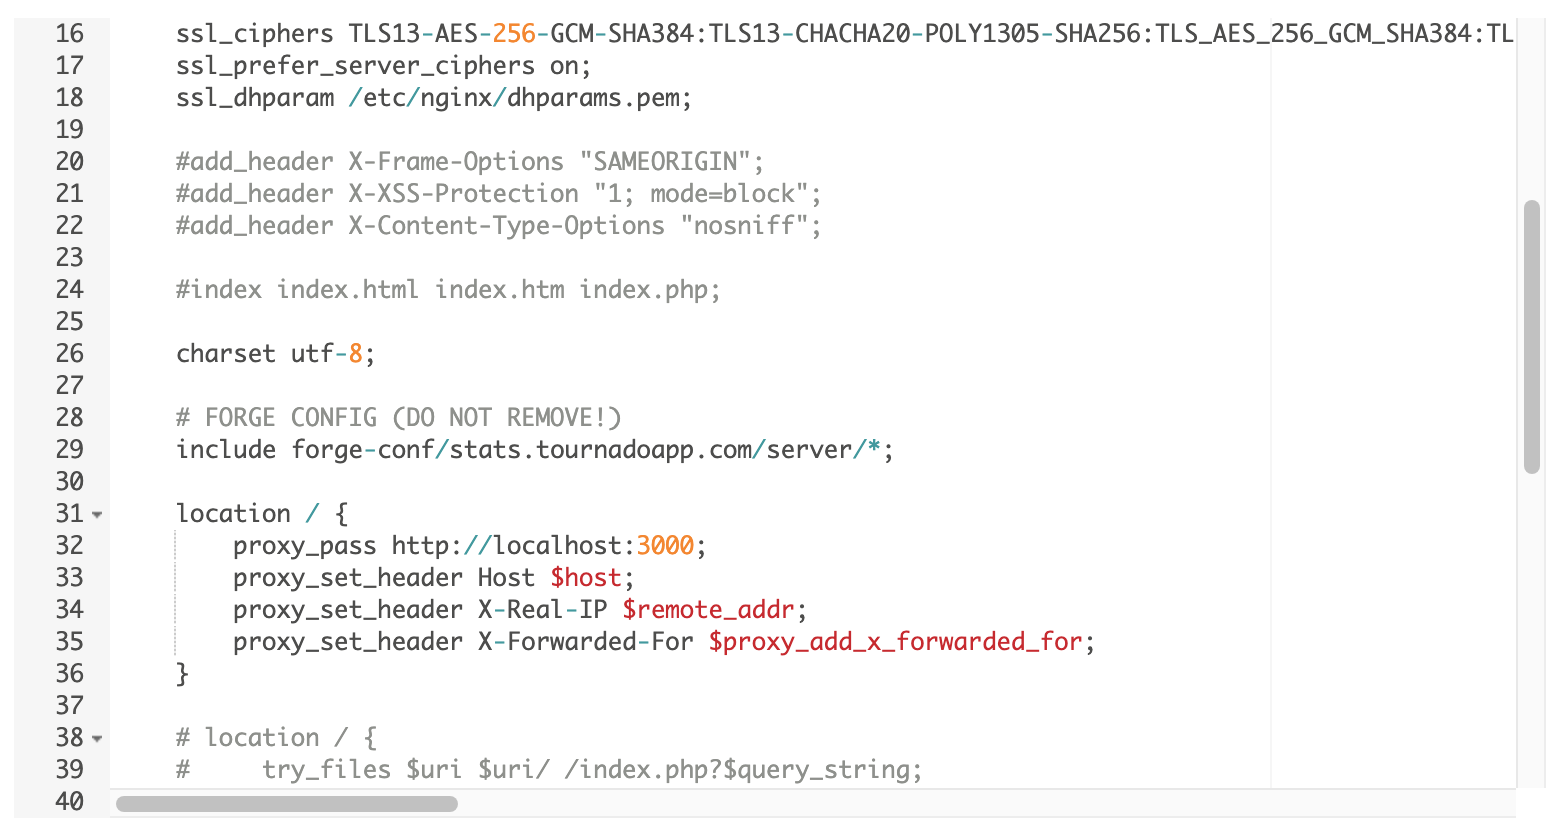
Almost there. Finally we will change the Nginx conf to proxy the traffic. Click the Files button at the very bottom of the page, click 'Edit Nginx configuration', and add this location block as shown below.
location / {
    proxy_pass http://localhost:3000;
    proxy_set_header Host $host;
    proxy_set_header X-Real-IP $remote_addr;
    proxy_set_header X-Forwarded-For $proxy_add_x_forwarded_for;
}
At long last you should be able to access Umami at https://stats.yourdomain.com now. Login using admin/umami and change your password, then click 'Settings' and create a website to track, save it, and click the </> button to collect the tracking code.
Add the tracking code to your website, visit the website, and return to https://stats.yourdomain.com/realtime where you'll hopefully see your visit in the realtime stats!
And finally
When you release the tracker to your production website or app, you probably don't want your own traffic skewing the data.
On a web app you might want to add the tag in your blade template only when it's in production, and the user is logged in, and isn't an admin (the example assumes you've setup getIsAdminAttribute() on the User model).
@if( config('app.env') == 'production' && Auth::user() && !Auth::user()->is_admin )
    <script async defer data-website-id="xxxxxxxx-xxxx-xxxx-xxxx-xxxxxxxxxxxx" src="https://stats.yourdomain.com/umami.js"></script>
@endif
This blog is a static site made with Jigsaw so I'm including the tag only in the production build, and additionally I'm adding the tag dynamically only when a localStorage key called disable-tracking isn't true. This might be overkill for you on your blog, but since mine is quite new, I'm still quite a large proportion of the traffic 😂
@if ( $page->production )
    <script>
    if(!window.localStorage.getItem('disable-tracking')) {
        var script = document.createElement('script');
        script.src = "https://stats.yourdomain.com/umami.js"
        script.setAttribute('data-website-id', 'xxxxxxxx-xxxx-xxxx-xxxx-xxxxxxxxxxxx')
        document.getElementsByTagName('head')[0].appendChild(script);
    }
    </script>
@endif
Going further
The ultimate setup for me would be to use Umami across all sites by hosting that instance on a VM and proxying a sub path (rather than a sub domain) from each site that uses it (siteA.com/stats siteB.com/stats) through to that instance. I believe this is possible from reading some support threads on GitHub, but I couldn't get it to work immediately and since I don't actually need it at this time. I thought I'd just finish up and spend that time writing this blog post instead.
If you have a more advanced setup, please post a comment!